
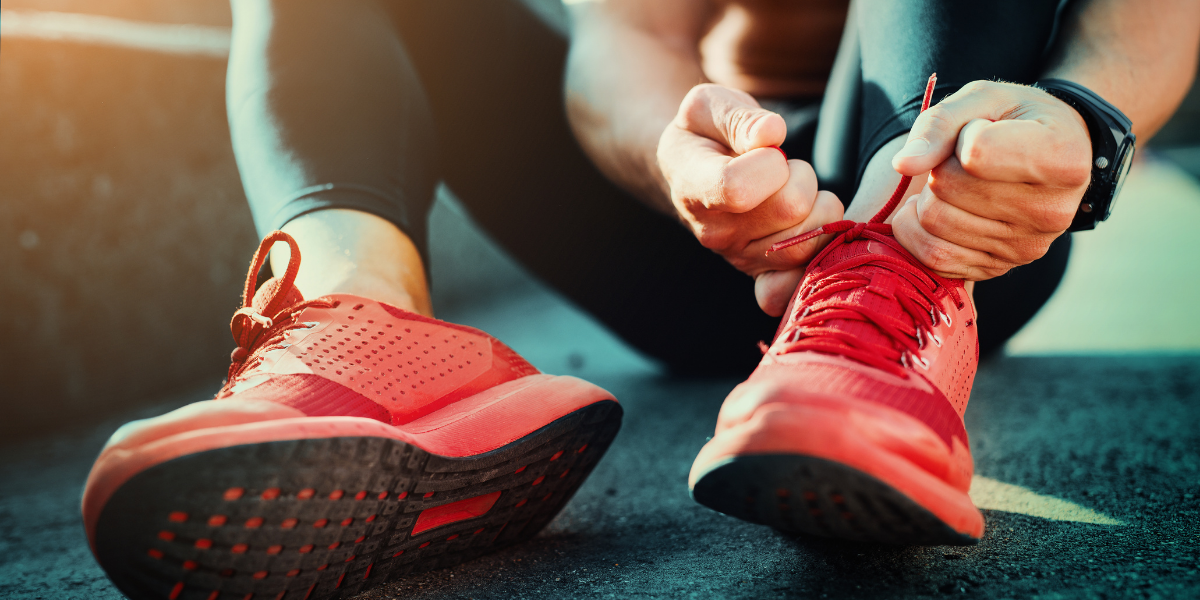
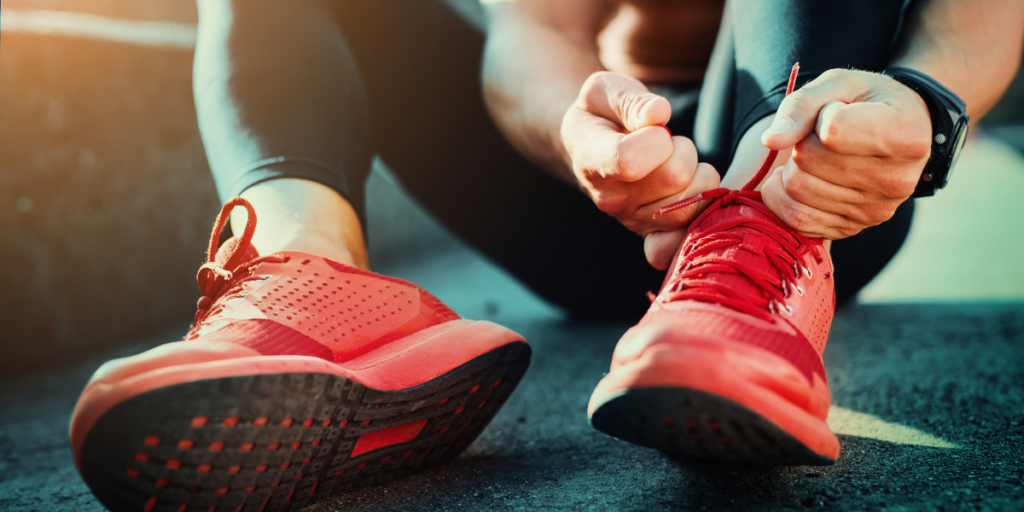
Lacing our shoes the right way is a small but powerful tool being used by Australian netball players to optimise their comfort, fix problems like the heel slipping or the top of the foot feeling tight, and prevent things like blisters or corns.
And when you’re involved in a dynamic, high-agility sport like netball, every little bit of support, injury prevention and on-court performance optimisation matters. Here are our tips for lacing netball shoes and five lacing techniques to help you move and feel your best.
Shoe Lacing Tips
To help you move faster, stop better and optimise your movement on the court, we recommend:
- That your lacing is firm, but not too tight. If your feet start to feel numb, tingly or cold – that’s a sign that you need to loosen your laces
- That your laces extend all the way to the back eyelet for maximum ankle stability and control
- Trying a lace lock to help add stability
- Trying the five different lacing techniques below to be able to feel the difference, and learn what works and feels best for your feet. Every foot is different with many different characteristics, so the best lacing for you may be different to the lacing your teammates feel best in
- Ensuring you have the right netball shoes that match your foot size, width and foot type. Lacing correctly can help with certain discomforts – but to get the most out of your netball shoes, you need to start with the right foundations – well-fitted, good shoes
What’s The Difference Between A Netball Shoe And A Running Shoe?
If you’re looking into lacing techniques to help you get the most out of your time on the netball court, then it’s worthwhile looking into whether you should have dedicated netball shoes instead of using your runners. Running shoes are focused on helping you get ahead and optimise your speed while running forwards. This means that their design features focus on the shoe effectively rolling forwards through a step with maximum efficiency.
Netball shoes are designed with the demands of netball in mind – rapid acceleration and declaration, high-impact jumps and stops, quick side-to-side (lateral) movements and more. Hence, netball shoes are designed to withstand these movements, adding greater stability and control for those lateral movements, sitting closer to the ground for added stability and injury prevention, cushioning to help our bodies absorb shock and reduce the on-court impact, delivering extra grip through non-marking rubber, extra durability and support for pivoting with greater shoe stiffness, and more.
Simply put: netball shoes are designed for the various demands that netball places on your body.
Five Lacing Techniques To Optimise Performance
Here are five lacing techniques for you to try to see what feels best for your feet. We’ve categorised these based on discomforts you may be experiencing in your shoes at present, but it’s worthwhile trying all these techniques to see which one leaves your feet feeling most stable and supported.
Heel Slip Lacing
Keeping your heel in place and moving together with your shoe, not against, is critical when you’re running up and down the court. Heel slipping is not only distracting but can cause instability and injury. Using the 7th eyelet and creating a loop lacing lock (detailed below) can help boost foot stability, reduce pressure when extending and flexing your foot, enhance your performance, and in many instances is better than regular 6-eyed lacing in reducing the risk of lower limb injury.
- Lace shoes in the usual criss-cross pattern until the second-to-last eyelet.
- Thread the lace through the last eyelet on the same side of the shoe, so that the lace comes out on the inside of the shoe, creating a loop between the last two eyelets.
- Finally, cross your laces and insert them through the loops that you’ve created and pull tightly to secure the shoe around your foot.
- Tie laces as normal.
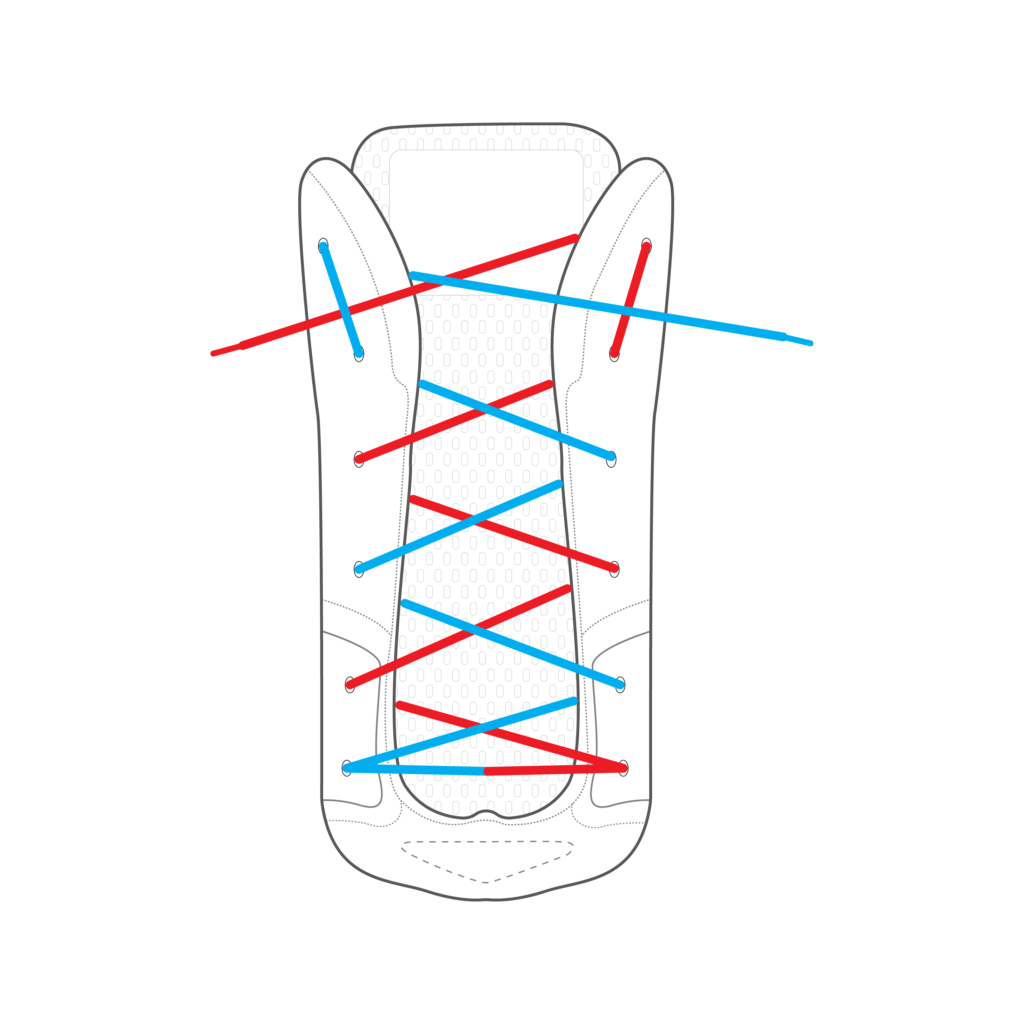
Lacing For Reduced Toe Pain
Some movements on the court, like pivoting or rapidly changing direction, can push your toes against the shoes, leading to discomfort or pain, and potential damage to your toenails over time. Over time and many games and training sessions, this can also lead to toe pain. This lacing style may help.
- Start by making your laces uneven – you want the lace closest to your big toe to be about 10cm shorter in length.
- Lace from the eyelet at the big toe to the eyelet at the top on the opposite side – so it goes diagonally across the whole shoe.
- With the other (longer) lace, and criss-cross it across all of the eyelets.
- At the top, tie the lace as normal.
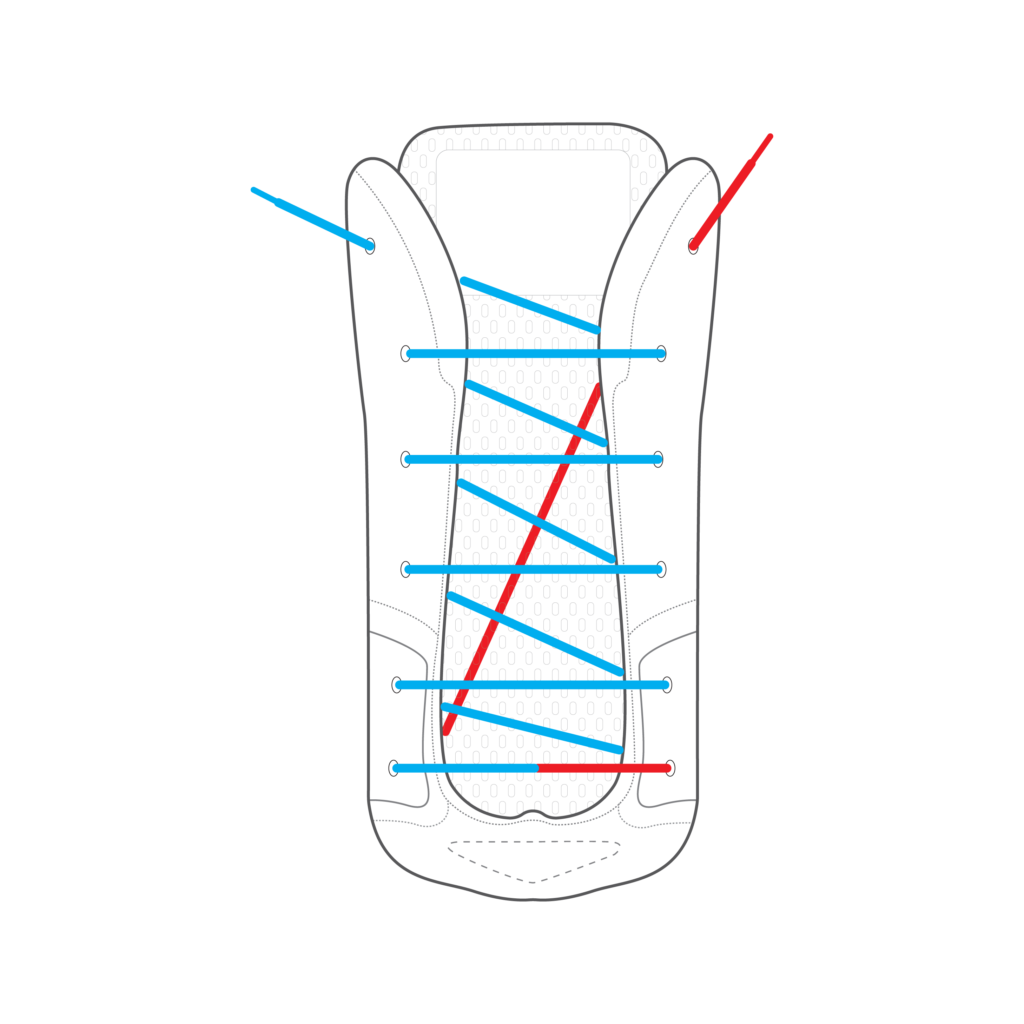
Lacing For Tight Shoes Or Swollen Feet
When you’ve been on your feet all day it’s normal for your feet to swell somewhat, which is why people often think that their feet are bigger at the end of the day – because they are! Similarly, tired feet are often swollen feet. Late, or night matches in particular might have your feet feeling a bit more snug in your shoes than usual. If you feel like your shoes are too tight, “straight bar” lacing evenly distributes the laces for better comfort and may help.
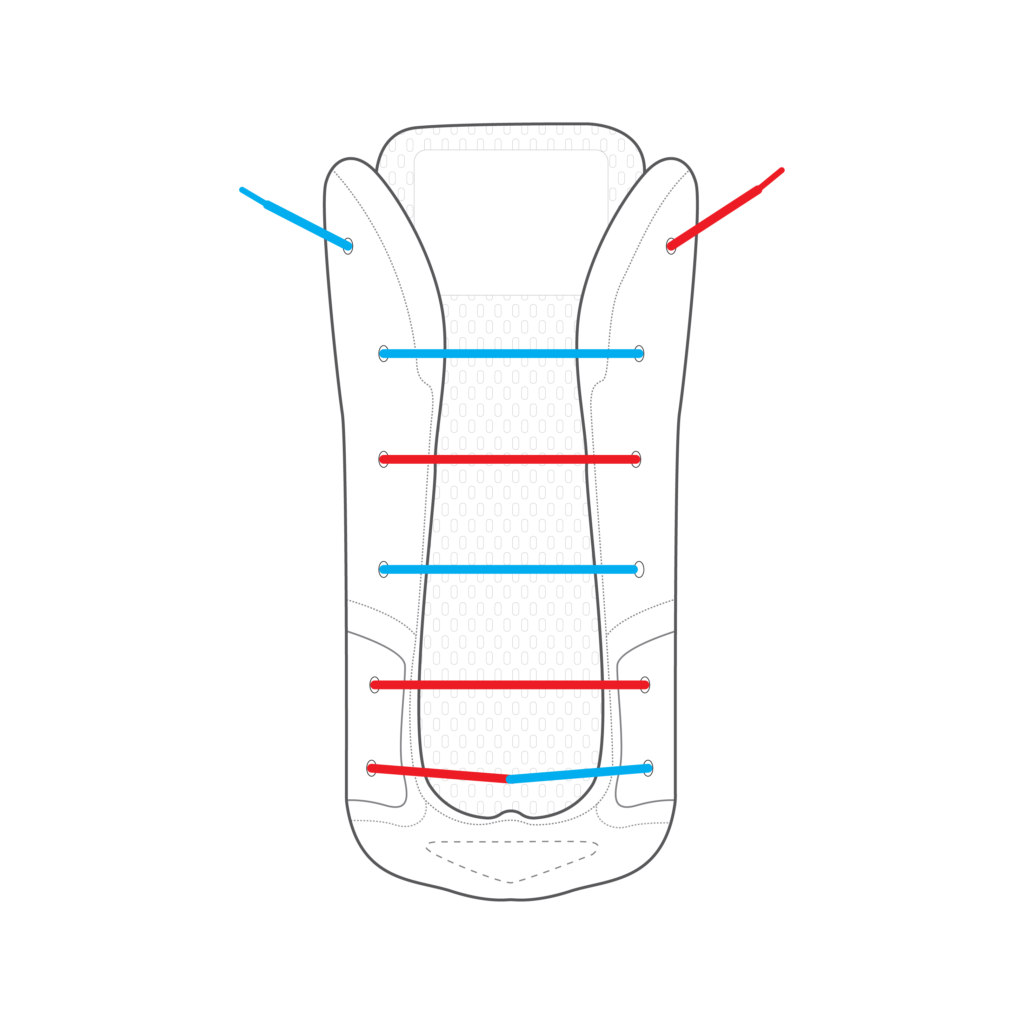
- Lace the shoes in a horizontal fashion, by skipping every other eyelet for each lace and running the lace up the side of the eyelets to reduce pressure.
- Tie the laces as normal.
Lacing For High Arches
Aside from making it harder for your feet to efficiently absorb shock, high arches can also leave a bulge protruding around the midfoot that rubs against the top of the shoe, and can make netball shoes (along with a variety of other shoes) uncomfortable. Here’s a lacing technique that gives your foot some breathing room at the midfoot, while still maintaining good support and stability.
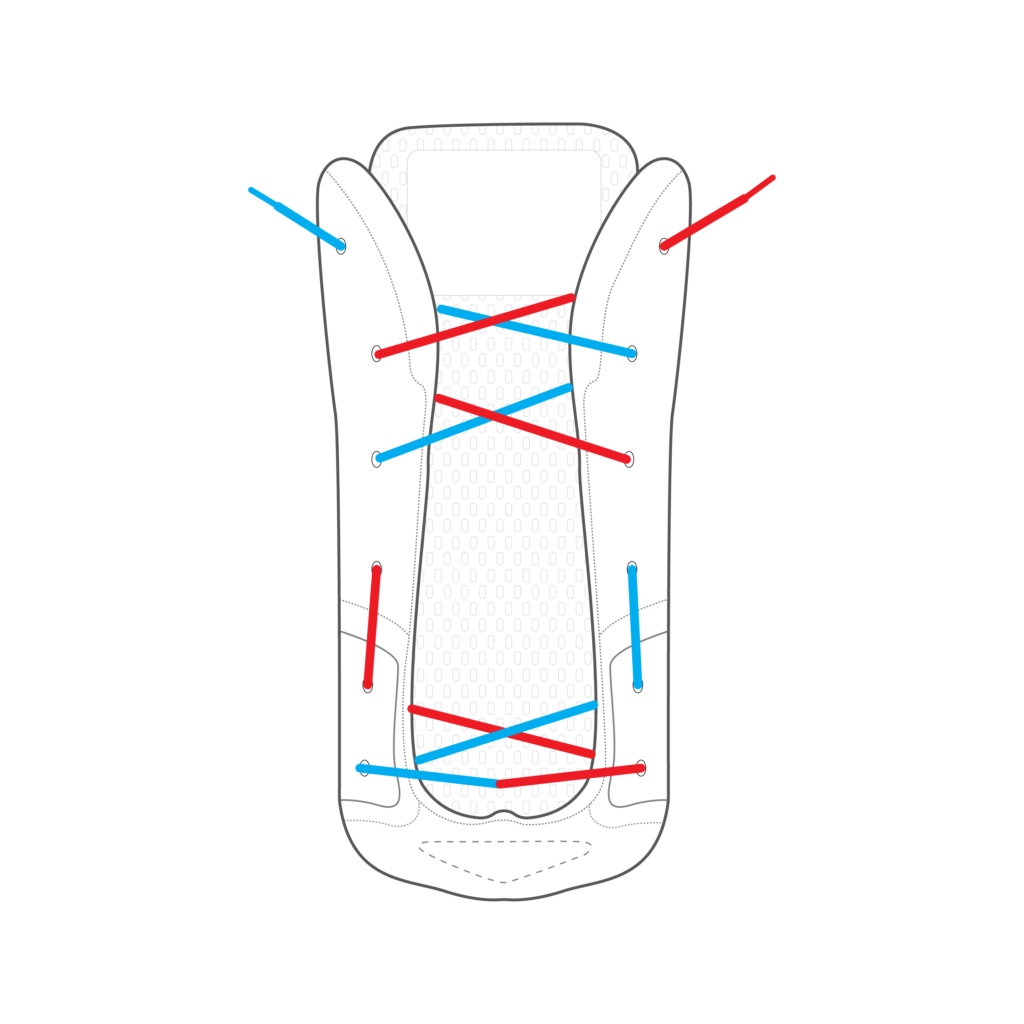
- Start lacing normally with a criss-cross for one or two eyelets.
- In the middle section of your shoe, thread the shoelace through the eyelet directly above it (don’t cross over).
- Then resume normal criss-cross lacing through the final two eyelets and tie as normal.
Lacing For Wide Feet
Wide feet change the way a shoe fits and feels, and can limit the movement of the toes, meaning that they aren’t properly able to splay and flex to support and optimise balance and movement. Here’s a lacing technique to try to give wide feet that breathing room while keeping the foot stable and in control.
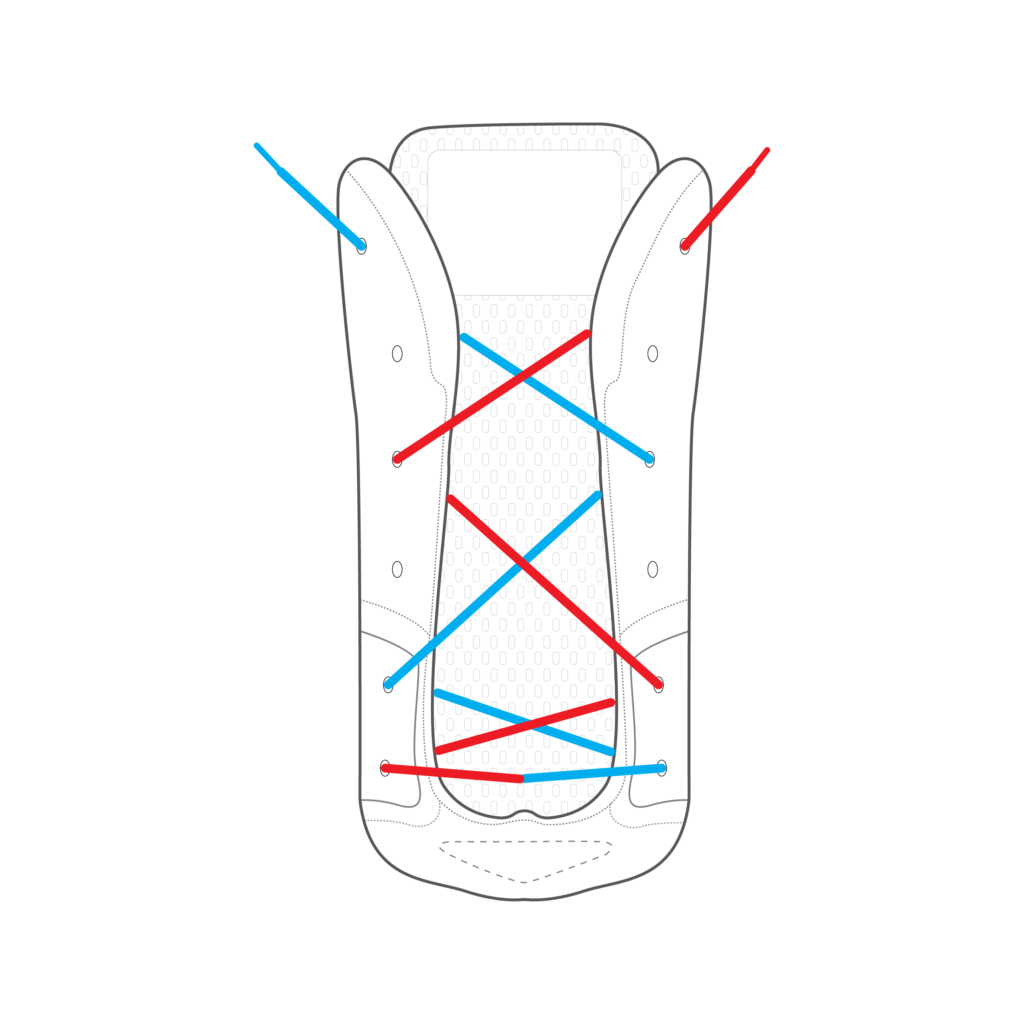
- Begin lacing in a normal criss-cross for 2 eyelets.
- Then start criss-cross lacing skipping every other eyelet.
- Tie as normal.
Ready For A Fantastic Season?
If you’re ready to get on the court, our podiatrists are ready to help you have your best season yet. If pain arises, you sustain an injury, or you want to optimise your performance but aren’t sure where to start, we can help. Our podiatrists are trusted by athletes from a range of sports across Australia, playing at both professional levels and socially.
Book your appointment with us online here or call us on 1800 FOOT DR.
References
[1] http://www.tandfonline.com/doi/abs/10.1080/02640410802482425?journalCode=rjsp20
[2] https://pubmed.ncbi.nlm.nih.gov/19156560/